旋转接头拆装方法
O PWS
ENGENEERED SYSTEMS
a TiEED, company
Endura“ 8000 Series Swivel
Step 1: Support and secure outboard weight of loading arm or swivel Note: Corrosion on any sealing surface may indicate need for component
assembly with crane or lifting device while performing the following steps. replacement.
It is recommended that the swivel be removed from the supporting loading
arm prior to any seal maintenance. All torsion spring pre-load must be
removed from torsion-spring prior to any swivel joint disassembly.
Step 6: Align flange with
body and press surfaces
together. Thread flange bolts
with Nord-Lok™ washers into tail
and torque to amount shown on
chart. Nord-Lok™ washers come
as an assembly bonded together
from the factory. It is important
that the correct orientation be
preserved for proper function.
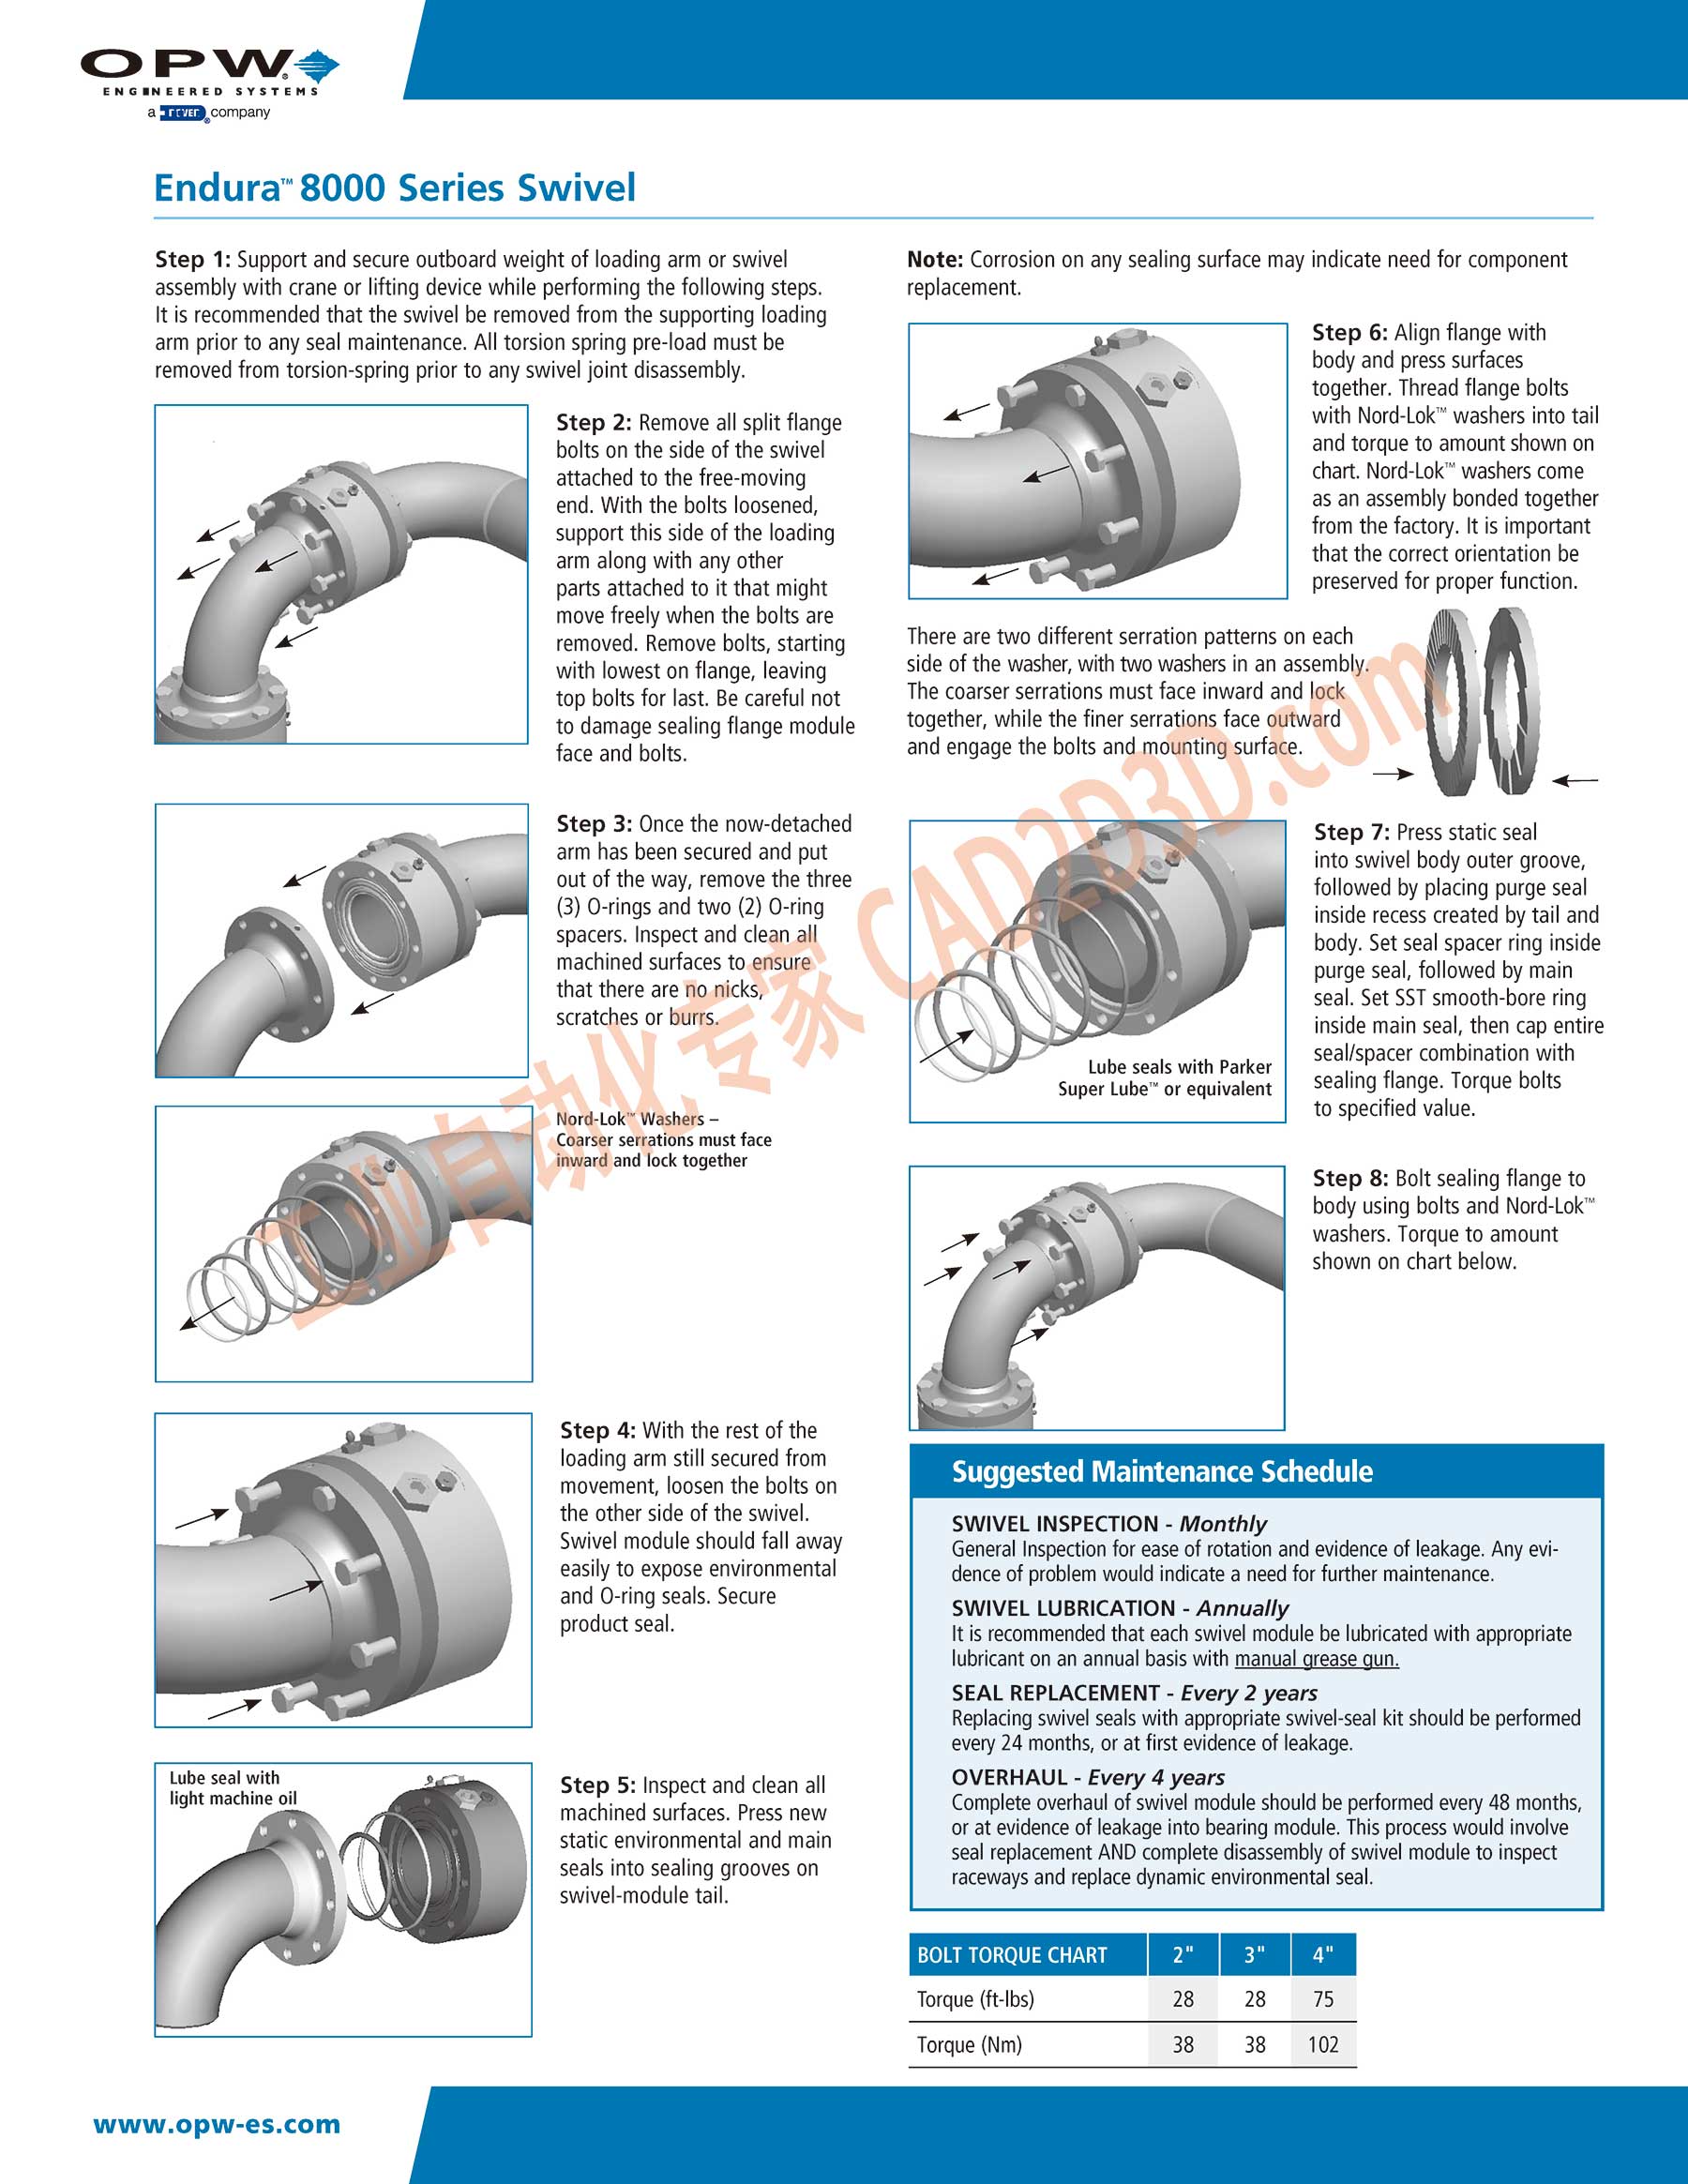
Step 2: Remove all split flange
bolts on the side of the swivel
attached to the free-moving
end. With the bolts loosened,
support this side of the loading
arm along with any other
parts attached to it that might
move freely when the bolts are
removed. Remove bolts, starting
with lowest on flange, leaving
top bolts for last. Be careful not
to damage sealing flange module
face and bolts.
There are two different serration patterns on each
side of the washer, with two washers in an assemb
The coarser serrations must face inward and |
Step 3: Once the now-detached
arm has been secured and put
out of the way, remove the three
(3) O-rings and two (2) O-ring
spacers. Inspect and cle:
machined surfaces to
that there are no nick
scratches or
Step 7: Press static seal
into swivel body outer groove,
followed by placing purge seal
inside recess created by tail and
body. Set seal spacer ring inside
purge seal, followed by main
seal. Set SST smooth-bore ring
inside main seal, then cap entire
seal/spacer combination with
sealing flange. Torque bolts
to specified value.
Lube seals with Parker
Super Lube™ or equivalent
Step 8: Bolt sealing flange to
body using bolts and Nord-Lok™
washers. Torque to amount
shown on chart below.
Step 4: With the rest of the
loading arm still secured from
movement; loosenthe boltsion Suggested Maintenance Schedule
the other side of the swivel. SWIVEL INSPECTION - Monthly
Swivel module should fall away General Inspection for ease of rotation and evidence of leakage. Any evi-
easily to expose environmental dence of problem would indicate a need for further maintenance.
and O-ring seals. Secure SWIVEL LUBRICATION - Annually
product seal. It is recommended that each swivel module be lubricated with appropriate
lubricant on an annual basis with manual grease gun.
SEAL REPLACEMENT - Every 2 years
Replacing swivel seals with appropriate swivel-seal kit should be performed
every 24 months, or at first evidence of leakage.
Step 5: Inspect and clean all OVERHAUL - Every 4 years
macfiined su}:faces Press new Complete overhaul of swivel module should be performed every 48 months,
statieiehigifofimeh | ii or at evidence of leakage into bearing module. This process would involve
li li seal replacement AND complete disassembly of swivel module to inspect
seals into sealing grooves on raceways and replace dynamic environmental seal.
swivel-module tail.
BOLT TORQUE CHART -n
Torque (ft-lbs)
Torque (Nm) 38 38 102
Lube seal with
light machine oil
www.opw-es.com
�

 本站所有资源一键获取,含3D模型、设计软件和案例视频等
 支付宝现金红包,又疯狂“大面积”送钱了!人均 1-20 元 (无套路/每天能领)